Traditional kitchen outlets often work reliably, yet they can limit flexibility near counters, islands, and appliance stations. A track system can create a cleaner power layout without adding multiple wall plates. However, the upgrade requires more than replacing visible hardware. Existing wiring, circuit capacity, grounding, wall conditions, and moisture exposure all deserve careful attention. This guide explains how to upgrade traditional kitchen outlets to a track system with practical steps and safety-focused decisions.
A qualified electrician should inspect the circuit before any installation begins. In many kitchens, older wiring may not support today’s coffee makers, air fryers, mixers, and charging devices. The track’s rating must match the circuit, and every connection should remain enclosed and properly grounded. Placement also matters. A track beside a backsplash may improve access, while a poorly positioned unit can interfere with cabinets or collect grease. Measure twice.
The five tips focus on planning, compatibility, installation, protection, and long-term maintenance. They reflect common remodeling experience, but every kitchen has different constraints. A sleek result is not automatically a safe result. Even careful plans can miss hidden junctions or overloaded circuits. That is why professional verification remains valuable, especially in older homes. Before choosing a finish or accessory, confirm local electrical requirements and the manufacturer’s installation instructions. Small details matter here.
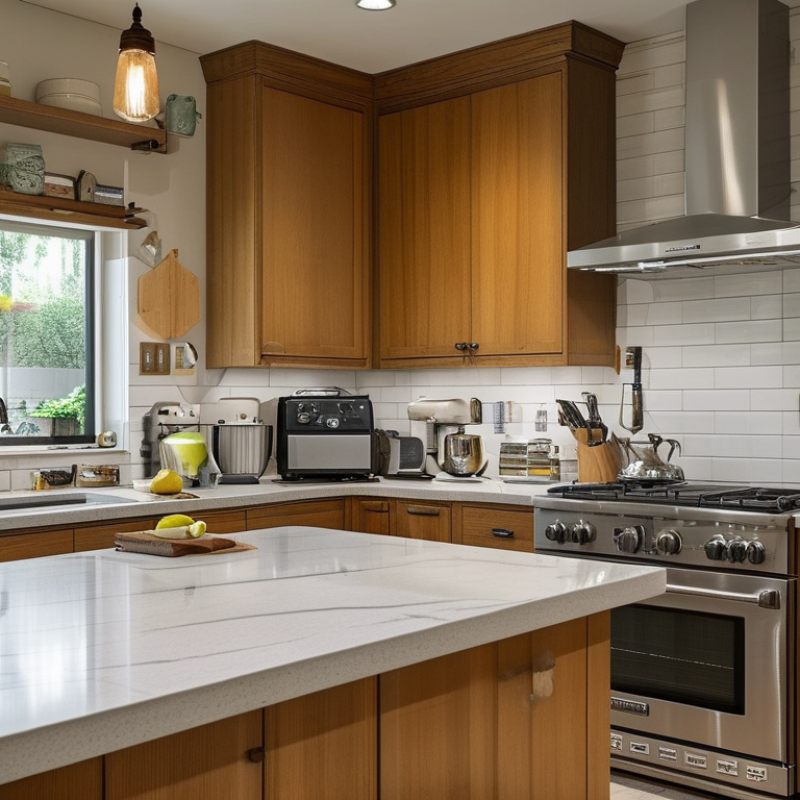
Replacing traditional kitchen outlets with a track system can make daily cooking safer, cleaner, and more adaptable. Fixed sockets often leave appliances clustered around one wall. A track system moves power closer to mixers, coffee makers, and preparation areas. It can also reduce loose extension cords across the worktop. The International Energy Agency reports that buildings consume about 30% of global final energy, so smarter electrical planning matters, even in a small kitchen.
Tip 1: Map appliance zones before installation. Keep high-use devices near preparation areas, not beside the sink.
Tip 2: Choose a system with protected covers and clear load ratings. Kitchens combine heat, water, and heavy electrical demand. NFPA research consistently identifies electrical distribution and lighting equipment as a significant factor in home fires involving electrical failures. That warning deserves attention.
Tip 3: Separate high-load appliances from general outlets.
Tip 4: Include USB or low-voltage charging only when genuinely useful.
Tip 5: Leave room for future movement. Track systems are valuable because modules can be repositioned without opening the wall, but poor planning still creates clutter.
I have seen attractive installations fail when outlets sit behind small appliances. A professional electrician should verify grounding, residual-current protection, spacing, and local code requirements. The NKBA’s 2024 Kitchen Trends research shows strong homeowner interest in functional, personalized kitchen upgrades. Still, flexibility is not automatically efficiency. Measure twice. Then question what you really use.
Upgrading traditional kitchen outlets to a track system should begin with measurement, not appearance. Record every appliance, its wattage, and when it operates. A kettle may use 1,500 watts, while an induction cooker can demand much more. Add refrigerators, ovens, dishwashers, and small appliances used together. This reveals whether existing circuits can handle the real workload. A circuit that seems adequate at noon may struggle during dinner preparation.
Study the kitchen layout at counter level. Mark preparation zones, splash areas, sinks, heat sources, and appliance doors. A track should serve useful workspaces without crossing wet zones or interfering with handles. Check wall construction, cable routes, mounting surfaces, and the distance from existing junction boxes. Tracks need secure fixing and suitable protection from moisture, grease, and accidental impact. A neat position is not always a practical one.
Ask a licensed electrician to verify conductor size, circuit protection, grounding, and local requirements before installation. Some kitchens need separate circuits for high-load appliances. Others may require protected outlets near water. Do not assume a new track increases available power; it mainly improves access and flexibility. It is easy to overestimate its value. I would also leave spare capacity for a future coffee machine or ventilation upgrade. That small decision can prevent another wall alteration later. When the layout changes, document the circuit map and label each outlet clearly. Mistakes happen. Clear records make them easier to find.
5 Tips to Upgrade Traditional Kitchen Outlets to Track Systems
A track system should solve access problems, not create new clutter. Choose a certified system with a clear load rating, durable insulation, and secure mounting. Measure the wall before ordering. A 60-centimeter track may look neat, yet it can leave appliances fighting for space. Select modules for common tasks: grounded outlets, USB charging, switches, and appliance connectors. Keep high-load devices separated when possible. Kettles, ovens, and portable induction units can quickly challenge a shared circuit.
Safety comes first. Specify residual-current protection, overload control, child-resistant shutters, and heat-resistant housings. Wet-zone installations need suitable ingress protection and local electrical-code compliance. NFPA’s Home Cooking Fires report estimates that cooking equipment caused 53% of reported U.S. home structure fires from 2017 to 2021. That figure makes placement and isolation more than design details. Avoid positioning outlets directly behind sinks or where steam constantly collects.
A track also needs practical maintenance. Leave enough clearance to remove one module without dismantling the entire rail. Use visible status indicators, but avoid bright lights near sleeping areas. The European Commission’s Energy Performance of Buildings materials identify buildings as using about 40% of EU energy, so controllable modules may support better appliance habits. They do not guarantee savings. I once specified too many charging points in a small kitchen; the rail became visually crowded. Fewer modules often work better. Keep it accessible. Have a qualified electrician verify the circuit, grounding, protection, and final installation before use.
| Upgrade Tip | Recommended Track or Module | Typical Electrical Specification | Best Kitchen Application | Important Safety Feature | Installation and Compatibility Check |
|---|---|---|---|---|---|
| 1. Confirm the electrical capacity first | Modular power track with grounded socket modules | 120 V or 230 V; commonly 10–16 A | Replacing several countertop outlets while keeping appliances organized | Overcurrent protection, grounding, and circuit protection suited to the local electrical system | Check the existing circuit rating, conductor size, breaker capacity, and local electrical code before selecting modules. |
| 2. Select the correct track length and layout | Surface-mounted or recessed track sized for the backsplash area | Track lengths commonly range from approximately 0.6 m to 1.5 m, depending on the system | Long countertops, appliance zones, islands, and compact preparation areas | Secure mounting, protected end caps, and no exposed live conductors during normal use | Measure the available wall length, clearance from sinks and cooktops, mounting surface, and cable-entry location. |
| 3. Match modules to actual appliance needs | Grounded power sockets, USB charging modules, switches, data modules, and blank covers | USB modules should use their stated output rating; power modules must match the circuit voltage and current | Small appliances, countertop devices, charging stations, and flexible work areas | Use shuttered socket outlets where required and avoid exceeding the total circuit load | Use dedicated circuits for high-load appliances such as ovens, dishwashers, or cooking equipment when required by code. |
| 4. Add moisture and shock protection | Track system with splash-resistant modules and suitable enclosure protection | Use an enclosure rating appropriate to the installation location; IP ratings are defined by IEC 60529 | Countertops near sinks, beverage areas, and food-preparation zones | Residual-current protection, commonly GFCI in many 120 V systems or RCD protection in many 230 V systems | Keep outlets away from direct splash areas and follow the required kitchen outlet distances for the country or region. |
| 5. Plan for future flexibility and maintenance | Reconfigurable modular track with movable or replaceable outlet modules | Module quantity and spacing depend on the track design and manufacturer limits | Changing kitchen layouts, home offices, rental kitchens, and multi-use islands | Power isolation before servicing, secure module locking, and accessible circuit protection | Leave space for future modules, keep the track accessible for inspection, and do not mix incompatible track components. |
Technical values are typical planning references rather than universal requirements. Final voltage, current rating, outlet placement, moisture protection, and installation method must comply with the applicable electrical code and be verified by a qualified electrician.
Upgrading a traditional kitchen outlet to a track system begins with careful preparation. Switch off the correct circuit breaker, then verify the outlet is dead with a properly rated voltage tester. Never rely on the switch position alone. Photograph the existing wiring before removing the faceplate and outlet. Check the electrical box for heat damage, loose connections, or corrosion. If the box is cracked or unstable, replace it before continuing.
Remove the outlet and label each conductor by function. Ground, neutral, and live wires must connect to the correct track terminals. Confusing them can create a serious shock or fire hazard. I used to rush this step, especially when the wiring looked obvious. That was poor practice. A small label takes seconds and prevents later uncertainty. Follow the track system’s installation instructions, and confirm that its load rating suits appliances used on that circuit.
Position the track level against the wall or backsplash. Mark the mounting holes, check for hidden pipes or cables, and use suitable anchors for the surface. Secure the track firmly without crushing its housing. Connect the wires with approved connectors, keep copper fully enclosed, and attach the grounding conductor correctly. Restore power only after replacing all covers. Test each outlet with a receptacle tester and check for warmth during normal use. If the wiring is old, aluminum-based, damaged, or unfamiliar, stop and contact a licensed electrician. A neat installation is not automatically a safe one.
Upgrading kitchen outlets to a track system starts with careful testing, not decoration. Turn off the circuit and confirm isolation with a reliable voltage tester. A qualified electrician should verify grounding, circuit capacity, and local electrical requirements. Test every outlet after installation, including USB ports and movable connections. Check for warmth, loose movement, flickering power, or unusual sounds. Stop immediately if anything feels abnormal.
Organization affects daily safety. Place the track away from sinks, cooktops, and areas exposed to steam or splashing. Keep frequently used outlets near work zones, but leave enough space for cords to bend naturally. Label circuits inside the cabinet or electrical panel. This small detail can save time during repairs. Avoid crowding several high-load appliances onto one circuit. I once underestimated the power demand of a compact countertop oven and kettle. The layout looked tidy, but the circuit became overloaded.
Maintenance should be simple and regular. Wipe the track with a dry or slightly damp cloth after switching power off. Never spray cleaner into outlet openings. Inspect mounting screws, covers, and sliding modules every few months. Test safety devices according to the manufacturer’s instructions. Keep a dated maintenance record. It exposes patterns that memory misses. My own early checklist was too short, and I failed to record one loose connection. That mistake changed how I inspect upgraded systems. If a module becomes difficult to move, stop using it instead of forcing the mechanism.
Use a structured testing, organizing, and maintenance schedule after upgrading kitchen outlets to a track-based power system. Intervals should always be adjusted to local electrical codes and the manufacturer's instructions.
: List every appliance, its wattage, and its operating time. A kettle may use 1,500 watts. Add appliances that operate together during meal preparation. A circuit that seems fine at noon may struggle during dinner.
Mark sinks, splash zones, heat sources, appliance doors, and preparation areas. Keep the track away from constant steam and direct water contact. Check that doors and handles open freely. A neat position may still be impractical.
No. It mainly improves access and flexibility. It does not increase a circuit’s capacity. A qualified electrician should check conductors, grounding, and circuit protection. Leave spare capacity for future appliances.
Choose a certified system with secure mounting and a clear load rating. Useful modules may include grounded outlets, switches, and charging ports. Include overload control and residual-current protection. Child-resistant shutters can improve safety.
Install enough modules for real tasks, not every possible device. Too many charging points can make a small kitchen look crowded. Fewer modules often work better. Plan clear access around each appliance.
Avoid locations with constant moisture, steam, grease, or high heat. Use suitable protection for damp areas. Keep outlets away from splash paths whenever possible. Keep it clear.
Switch off the correct circuit breaker and test the outlet with a rated voltage tester. Do not rely only on the switch position. Photograph the wiring before removal. Label live, neutral, and grounding conductors carefully. Mistakes happen.
Contact one when wiring is old, damaged, aluminum-based, or unfamiliar. They should verify the circuit, grounding, protection, and final connections. They can also check hidden cables and pipes before drilling. A tidy installation is not automatically safe.
Replace every cover before restoring power. Test each outlet with an appropriate receptacle tester. Check for unusual warmth during normal appliance use. Document the circuit map and label every outlet. Clear records help locate future problems.
Upgrading traditional kitchen outlets to a track system can create a cleaner, more flexible, and better-organized power setup. This guide explains how to upgrade traditional kitchen outlets to a track system by first evaluating your kitchen’s appliance load, outlet locations, counter space, and available wall area. It then covers how to choose a suitable track length, compatible modules, grounding protection, child-safety features, and other components that support safe daily use.
The installation process includes turning off the power, removing existing outlets carefully, preparing the mounting surface, and securing the track according to its instructions. After installation, each module and connection should be tested to confirm stable operation and proper protection. The guide also offers practical advice for arranging modules around work areas, avoiding overloaded circuits, keeping the track clean, and checking connections regularly. With thoughtful planning and routine maintenance, a track system can make kitchen power access more convenient while preserving a tidy and functional workspace.

Ranko Power